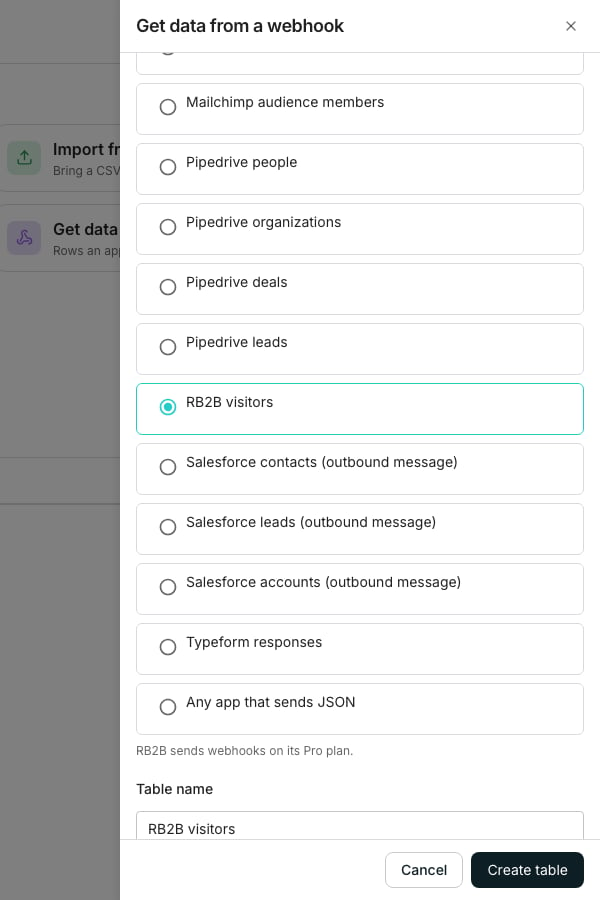
The Get data from a webhook panel, with RB2B visitors picked.
Make a webhook table
Open the drawer
Pick what sends the rows
Create the table
Pick how the app gets the URL
- Typeform, Pipedrive, Attio, Calendly, and Mailchimp send through a connection. Oneprofile registers the URL with the app, so there is nothing to paste.
- RB2B, Salesforce outbound messages, and any app that sends JSON need the URL pasted in. The Source panel lists the steps.
- Facebook Lead Ads takes both, plus two secrets under Secrets.
Send RB2B visitors
Copy the URL
Paste it into RB2B
Send a test
Send from any app
Add a webhook that sends JSON in your app, and paste the URL as its address. Each delivery is kept whole in the table’s record column. Open a row’s record cell and choose Add as a column to give any field its own column. In the drawer, fill in Match rows on with the field that tells rows apart, such asemail. A later delivery with the same value updates that row.
Fix failed deliveries
Deliveries counts what the URL received in the last 24 hours and in all. Failed deliveries lists each one that did not fit, newest first, with the fields that went wrong. Fix the cause, then click Retry to read it again and add what fits.Replace or revoke the URL
Click Replace URL when a URL leaked. Choose Keep the old URL working for 7 days while you update the app, or Stop the old URL now. Revoke URL stops the rows for good, and every row stays. Make a new URL starts them again later, with the same app and match field.Good to know
How do I set up Salesforce outbound messages?
How do I set up Salesforce outbound messages?
- In Salesforce, open Setup, search for Outbound Messages, and click New Outbound Message.
- Pick the table’s object, paste the URL into Endpoint URL, and leave Send Session ID unticked.
- Add Id, SystemModstamp, and every field the table shows, then save.
- In Flow Builder, make a record-triggered flow on the same object that runs when a record is created or updated. Add the message as its action and activate the flow.
How do I set up Facebook Lead Ads?
How do I set up Facebook Lead Ads?
- Under Secrets, paste your Meta app’s App secret as the Signing secret, and a Verify token you make up. Click Save beside each.
- In Meta for Developers, open your app’s Webhooks settings, pick Page, and click Subscribe to this object.
- Paste the URL into Callback URL and your verify token into Verify token, then click Verify and save.
- In the list of Page fields, subscribe to leadgen.
How do I change or remove a secret?
How do I change or remove a secret?
What does the connection decide?
What does the connection decide?
What does the panel say while the app is being set up?
What does the panel say while the app is being set up?
- “Registering the webhook with Typeform…” while it is being set up, or set up again after the app lost it.
- “refused to register the webhook” means the connection lacks permission to manage webhooks. Reconnect the app with that permission, then replace the URL.
- “didn’t answer”, “turned this webhook off”, or “didn’t give a signing secret” means rows stopped. Click Replace URL to register it again.
- “missing a setting the webhook needs, such as a Page ID” means the connection is not filled in. Fill it in on the connection, then replace the URL.
- “connection this webhook was registered through was deleted” means rows stopped. Revoke the URL, connect the app again, then make a new URL.
What if the feed is paused?
What if the feed is paused?
Which plan of the app sends webhooks?
Which plan of the app sends webhooks?
Can HubSpot, Shopify, or Intercom send rows to a webhook table?
Can HubSpot, Shopify, or Intercom send rows to a webhook table?
Why can't the AI Assistant tell me the URL?
Why can't the AI Assistant tell me the URL?
Does pasting the URL into RB2B replace another webhook?
Does pasting the URL into RB2B replace another webhook?
What happens when a visitor comes back?
What happens when a visitor comes back?
Can RB2B send companies without a person?
Can RB2B send companies without a person?
What if I leave Match rows on empty?
What if I leave Match rows on empty?
What do the failed delivery labels mean?
What do the failed delivery labels mean?
How long are failed deliveries kept?
How long are failed deliveries kept?
Why does the panel show a warning?
Why does the panel show a warning?
What happens to the URL when I delete the table?
What happens to the URL when I delete the table?