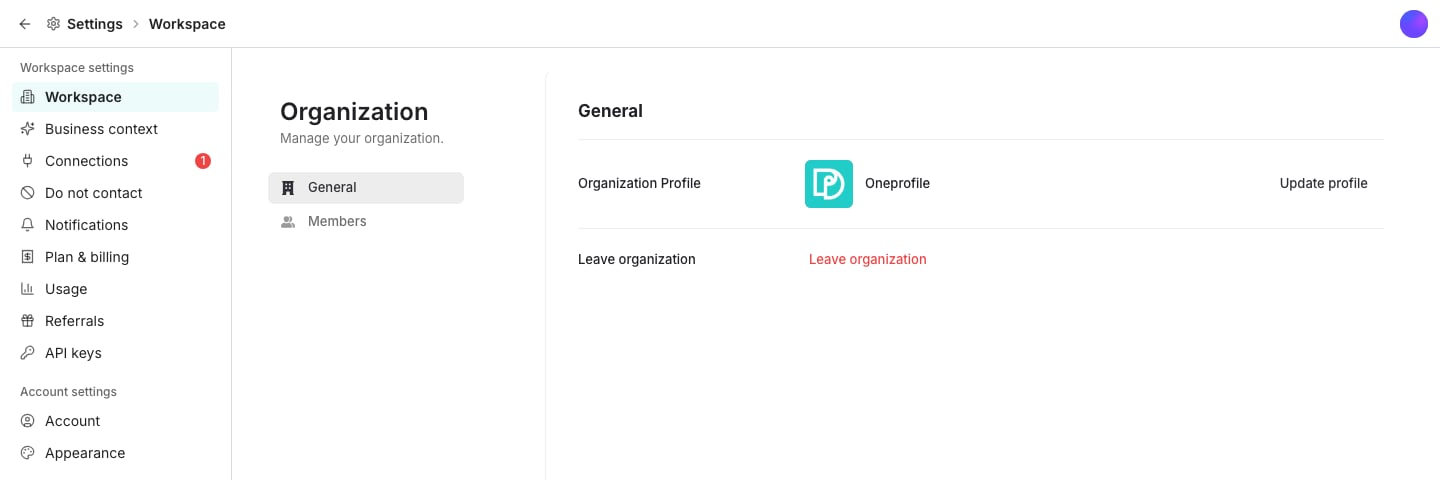
The Workspace pane in Settings.
Find your way around Settings
The rail on the left has four groups, each named for the question it answers.- Data is where your data comes from and what the AI may touch: Connections, Business context and AI Assistant.
- Outreach decides who a sequence may reach: Do not contact and Cooldown.
- The Workspace group holds what the whole team shares: Workspace, Plan & billing, Usage, Referrals and API keys.
- Personal holds Account, Notifications and Appearance, which are yours alone.
Name the workspace and invite people
Open Workspace. Its General tab holds the workspace name and logo behind Update profile, with Leave workspace below it. Its Members tab lists everyone who has joined, with Invite to add people by email and Invitations for the ones still open.What each pane is for
Most panes have their own page here.- Business context tells every AI feature what you sell and who you sell to. See Business context.
- Connections holds the tools your workspace is connected to. See Connect a tool.
- AI Assistant sets what the assistant may change without asking. See AI Assistant.
- Do not contact is the list Oneprofile will never email. See Do not contact.
- Cooldown keeps two sequences from reaching the same person at once. See Cooldown.
- Notifications chooses what you are told about, over email and Slack. See Notifications.
- Plan & billing holds your balance, and Usage your spend. See Credits and billing and Usage and reports.
- Referrals and API keys each have their own page too.
Good to know
How do I review a generated business context?
How do I review a generated business context?
Generate rewrites the sections it has something new for and shows each one against what it replaced, under Review the new business context. Choose Keep current or Use new per section, then click Apply. The fields stay locked until you decide, and Keep everything as it was discards the whole draft.
How do I take someone off Do not contact?
How do I take someone off Do not contact?
Select the rows, click Remove, then confirm. Those addresses can be emailed again, and opt-out replies and the inbox action will not add them back on their own. Export downloads the whole list as plain text.
Can I route Slack notifications by label?
Can I route Slack notifications by label?
Under When a reply is labeled, a rule sends replies carrying one inbox label to one Slack channel. Pick a Label and a Slack channel, then click Add rule.A label with no rule notifies nobody, which is how you keep out-of-office replies quiet. Rules keep their channels if you disconnect Slack, so reconnecting restores the routing.
Where do I manage API keys?
Where do I manage API keys?
API keys lets other tools reach your workspace. Click Create API key, name it, and choose a scope. Its full value shows once, so copy it right away; after that the grid shows only a masked version, and a key you no longer want can be deleted.
Where do referrals live?
Where do referrals live?
Referrals gives you a link to share, with a Copy button beside it. You and the person you invite both earn credits when they sign up, and more each when they start a paid plan. Those credits never expire.The page shows Friends joined, On a paid plan and Credits earned, above the list of everyone who used your link. The reward amounts are shown on the page itself, because they change.
How do I change the appearance?
How do I change the appearance?
Appearance sets how the dashboard looks on this device. It is an account setting, not a workspace one, so it changes nothing for anybody else on your team.
Where do I find my plan and usage?
Where do I find my plan and usage?
Both sit in the rail’s Workspace group. Plan & billing holds your plan, your credit balance, your payment method and your invoices. Usage breaks credit spend down by table, tool and agent.See Credits and billing and Usage and reports.
Where are help and the changelog?
Where are help and the changelog?
Help & support and Changelog are pinned below the rail, under a divider. Help & support opens a chat with us, and Changelog opens what shipped recently in a new tab.
Next steps
Credits and billing
See what spends credits and how to buy more.
Connect a tool
Connect the tools your workspace already uses.