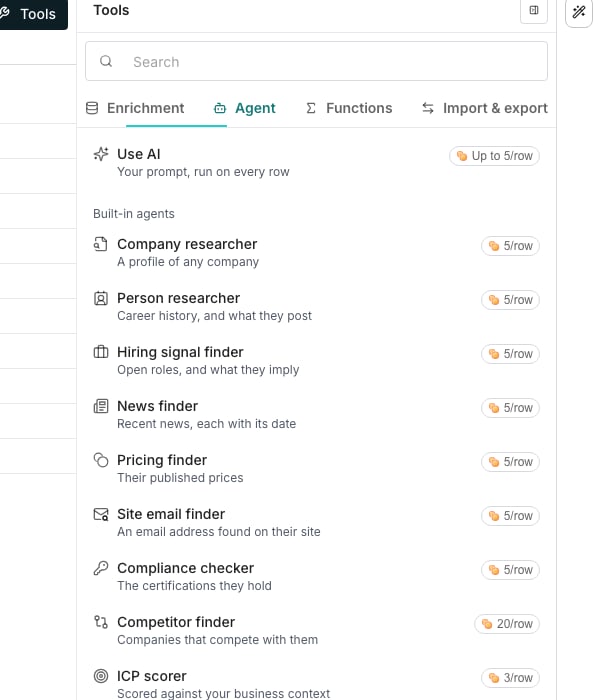
The Tools panel, open on the Agent tab.
Add an agent column
1
Open the Agent tab
Click Tools in the toolbar, then the Agent tab. Click Use AI at the top of the list to write a new prompt from scratch.
2
Describe the column, or write it by hand
The editor opens on an AI Assistant card asking what this column should find or write. Describe what you want and click Generate, or click Set up manually to fill in the fields yourself.
3
Choose effort
The Effort card sets which model the column runs on, and each option shows the most a row can cost. Turn on Web research to let the agent search the web, and Use business context to add your company profile to every run.
4
Write the prompt
In the Prompt card, type
/ to reference another column’s value, for example “Write a one-line summary of /Company”. / Column under the prompt inserts a reference without typing.5
Define the outputs
In the Outputs card, pick Fields to list what comes back, each with its own name and type. Each field becomes its own column once the agent runs.
6
Create and run a few rows
Click Create & run 10 rows to fill the table’s first 10 rows and check the answers. The split button also offers Create & run 50 rows and Create and don’t run. On a smaller table, the run options shrink to the rows it has.
Build an agent you can reuse
The Agents page is where you build agents to deploy on any table. It is one page with two sections: Start with a template and Browse agents. Pick a template card to open a filled-in editor, or click New agent to start from empty fields. See all templates opens every agent Oneprofile ships, plus the ones your team has saved.Good to know
What does the Agent tab list?
What does the Agent tab list?
Use AI comes first, the blank prompt you write on the spot. Your agents follows once you have saved one. Built-in agents sits under them, ready to run without writing a prompt.
How do slash references work?
How do slash references work?
Arrow keys move through the picker, and the right arrow drills into a column that holds several fields or list items. Click a pill to mark that reference required, so a row is skipped when the value is missing. Press Backspace to remove one.
What do the lookup switches under Web research do?
What do the lookup switches under Web research do?
Find work email and Read a LinkedIn profile each let the agent take that lookup while it researches. A row is charged a lookup’s price only when it finds something. A linked column follows its agent’s switches. See Web research and context.
How do I point the research at a starting page?
How do I point the research at a starting page?
Compare effort levels in the Effort card opens the full trade-off between the models. The Advanced disclosure below it sets a Starting URL column the research begins from, and can keep the agent on that domain.
How do I add and describe output fields?
How do I add and describe output fields?
Click Add output for another field, and Add description to explain one to the model. A description is worth writing when the field name alone could be read two ways.JSON Schema in the Outputs card replaces the field list with a raw schema you write yourself.
How do I test a prompt before running the whole table?
How do I test a prompt before running the whole table?
Run it on a few rows. Create & run 10 rows fills the first 10 rows and charges only for those. Read the answers, adjust the prompt, then run the rest.
What is different about columns deployed from a saved agent?
What is different about columns deployed from a saved agent?
A column deployed from a saved agent stays linked to it. A card at the top of its editor names the agent, and Open agent opens it in a new tab to change the prompt, effort, output or tools.The Quick set-up tab stays editable, so you can still remap which table columns feed the agent’s inputs. Click Keep a copy here on that card to keep a copy of its settings on the column instead.
Next steps
Enrichment columns
Fill a column from the catalog instead of a prompt.
Run columns
Control what runs, when, and over which rows.