> ## Documentation Index
> Fetch the complete documentation index at: https://docs.getoneprofile.ai/llms.txt
> Use this file to discover all available pages before exploring further.
# What agents do
> Save an agent once, then deploy the same one onto any table. The library behind agent columns.
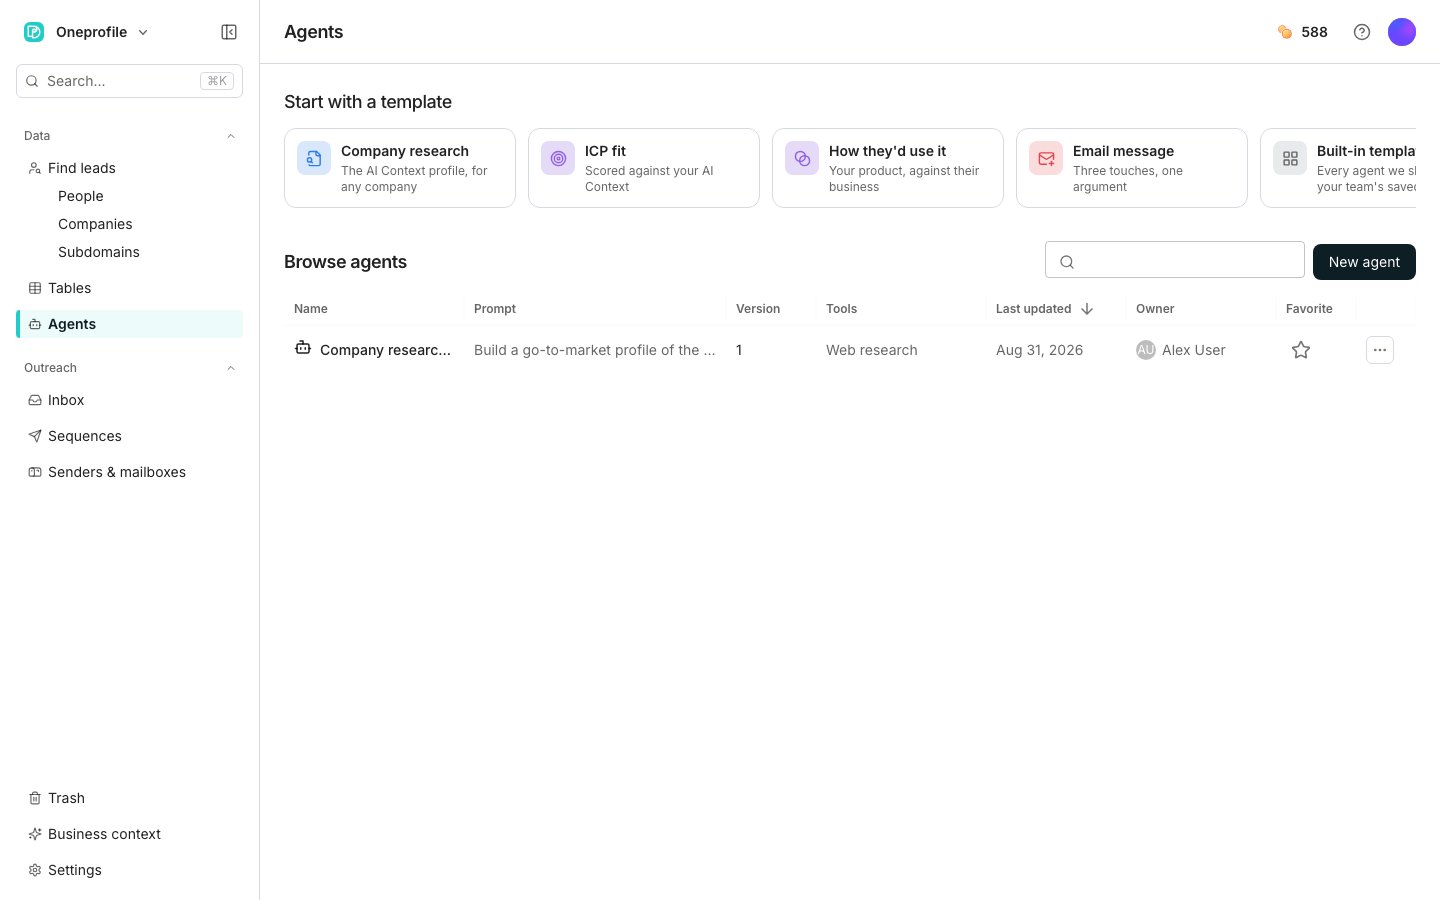
An agent column builds a prompt for one column on one table. The **Agents** page saves that work as a reusable agent you can deploy anywhere.
 ## Build and save an agent
Click **Agents** in the sidebar.
Pick a card under **Start with a template**, or click **Built-in templates** for the full gallery. Click **New agent** for a blank editor.
A template fills in the name, prompt, inputs and outputs. Adjust the **Effort**, **Inputs**, **Outputs** and **Tools** cards.
Click **Save**. The agent now appears under **Browse agents**.
## Deploy it to a table
Click **Add to table** in the editor header.
Choose a table, then point each input at a column. **Match inputs by name** fills them in by name where it can.
Name the column, then use the split button to add it and run a first batch.
Adding and running rows spends credits at once. **Add and don't run** is the free option.
## Good to know
A row's menu has **Edit agent**, **Duplicate agent**, **Where it's used** and **Delete agent**. The star marks a favourite.
**Where it's used** lists every table and column the agent is deployed on, and jumps to them.
**Duplicate agent** makes a private copy for you, reset to version 1 with no history.
**Save as template**, in the editor's menu, publishes a copy into your team's gallery under a name and description you give it. Both are copies: editing the original later changes neither.
Each deployment maps its own inputs, so remapping on one table leaves the others alone. **Entire row** is offered only when the prompt declares no inputs of its own.
When the outputs declare more than one field, the deploy dialog names a parent column and lets you rename or skip each field. It refuses a name that collides with a column already on that table.
**Train**, beside **Save**, runs the agent over sample rows so you can judge each result. Approving a revision saves a new version. The button stays off until the agent is saved and has a name and a prompt.
The version chip beside the name opens the history, and any earlier version can be reverted to.
Its prompt and outputs become read-only on the column, and a banner points back here. That behaviour is covered on [Agent columns](/tables/columns/agent-columns).
## Next steps
Build a prompt for a single column instead.
See what an agent run costs.
## Build and save an agent
Click **Agents** in the sidebar.
Pick a card under **Start with a template**, or click **Built-in templates** for the full gallery. Click **New agent** for a blank editor.
A template fills in the name, prompt, inputs and outputs. Adjust the **Effort**, **Inputs**, **Outputs** and **Tools** cards.
Click **Save**. The agent now appears under **Browse agents**.
## Deploy it to a table
Click **Add to table** in the editor header.
Choose a table, then point each input at a column. **Match inputs by name** fills them in by name where it can.
Name the column, then use the split button to add it and run a first batch.
Adding and running rows spends credits at once. **Add and don't run** is the free option.
## Good to know
A row's menu has **Edit agent**, **Duplicate agent**, **Where it's used** and **Delete agent**. The star marks a favourite.
**Where it's used** lists every table and column the agent is deployed on, and jumps to them.
**Duplicate agent** makes a private copy for you, reset to version 1 with no history.
**Save as template**, in the editor's menu, publishes a copy into your team's gallery under a name and description you give it. Both are copies: editing the original later changes neither.
Each deployment maps its own inputs, so remapping on one table leaves the others alone. **Entire row** is offered only when the prompt declares no inputs of its own.
When the outputs declare more than one field, the deploy dialog names a parent column and lets you rename or skip each field. It refuses a name that collides with a column already on that table.
**Train**, beside **Save**, runs the agent over sample rows so you can judge each result. Approving a revision saves a new version. The button stays off until the agent is saved and has a name and a prompt.
The version chip beside the name opens the history, and any earlier version can be reverted to.
Its prompt and outputs become read-only on the column, and a banner points back here. That behaviour is covered on [Agent columns](/tables/columns/agent-columns).
## Next steps
Build a prompt for a single column instead.
See what an agent run costs.